How To Repair A Leaky Outdoor Faucet: A Step-by-Step Guide
So, you’ve noticed that your outdoor faucet has been acting up lately, leaking water like it's auditioning for a role in the rainforest. Don’t worry, friend—you’re not alone. A leaky outdoor faucet is one of those pesky little problems that can drive anyone crazy. But here’s the good news: fixing it doesn’t have to be rocket science. With the right tools, a bit of patience, and this guide, you’ll be saving water and money in no time.
Let’s face it, a dripping faucet might seem small, but over time, it can waste gallons of water and bump up your utility bill. Plus, who wants to deal with the constant drip-drip-drip sound while trying to relax on a weekend afternoon? Not me, and probably not you either. That’s why learning how to repair a leaky outdoor faucet is a skill worth mastering.
In this article, we’ll walk you through everything you need to know about fixing that pesky leak. From identifying the source of the problem to replacing worn-out parts, we’ve got you covered. So grab your toolkit, put on your handyman hat, and let’s dive into the world of DIY plumbing. Trust me, by the end of this, you’ll feel like a certified faucet whisperer.
Why Do Outdoor Faucets Leak? Understanding the Problem
Before we jump into the nitty-gritty of repairs, it’s important to understand why your outdoor faucet is leaking in the first place. Believe it or not, there are several common culprits behind this annoying issue. Sometimes it’s as simple as a loose screw, while other times it might involve more complex plumbing problems. Let’s break it down:
- Worn-out washers or O-rings
- Corrosion or mineral buildup
- Cracked valve seats
- Improper installation
Most of these issues are relatively easy to fix if you have the right know-how. And hey, if you’re anything like me, the satisfaction of solving a problem with your own two hands is priceless.
Common Signs Your Outdoor Faucet Needs Repair
Now that we’ve covered the potential causes, let’s talk about the warning signs. If your outdoor faucet is showing any of the following symptoms, it’s probably time for a repair:
- Water dripping even when the faucet is fully closed
- Difficulty turning the handle on or off
- Visible rust or corrosion around the spout or handle
- A sudden increase in your water bill
These signs might seem obvious, but they’re often overlooked until the problem gets worse. The sooner you address them, the easier (and cheaper) the repair will be.
What You’ll Need to Fix a Leaky Outdoor Faucet
Before you start tinkering with your faucet, make sure you have all the necessary tools and materials. You don’t want to be halfway through the job only to realize you’re missing something crucial. Here’s a quick checklist to help you get prepared:
- Adjustable wrench
- Flathead and Phillips screwdrivers
- Pliers
- New washers or O-rings
- Plumber’s tape
- Penetrating oil (optional)
Most of these items can be found at your local hardware store or even online. And don’t worry if you’re not a seasoned DIYer—this project is beginner-friendly. Just take your time and follow the steps carefully.
Where to Buy Replacement Parts
When it comes to replacing worn-out parts, it’s important to get the right size and type. You can usually find replacement washers and O-rings at any hardware store, but if you’re unsure, bring the old parts with you for comparison. Some popular brands to look out for include:
- BrassCraft
- SharkBite
- Delta
Pro tip: If you’re shopping online, double-check the product specifications to ensure compatibility with your faucet model. Trust me, it’ll save you a lot of headaches later on.
Step-by-Step Guide: How to Repair a Leaky Outdoor Faucet
Alright, let’s get down to business. Here’s a step-by-step guide to repairing your leaky outdoor faucet. Follow these instructions carefully, and you’ll have your faucet working like new in no time.
Step 1: Turn Off the Water Supply
This is probably the most important step, so don’t skip it. Locate the shut-off valve for your outdoor faucet and turn it off. If you can’t find a dedicated valve, you’ll need to turn off the main water supply to your house. Safety first, folks!
Step 2: Remove the Faucet Handle
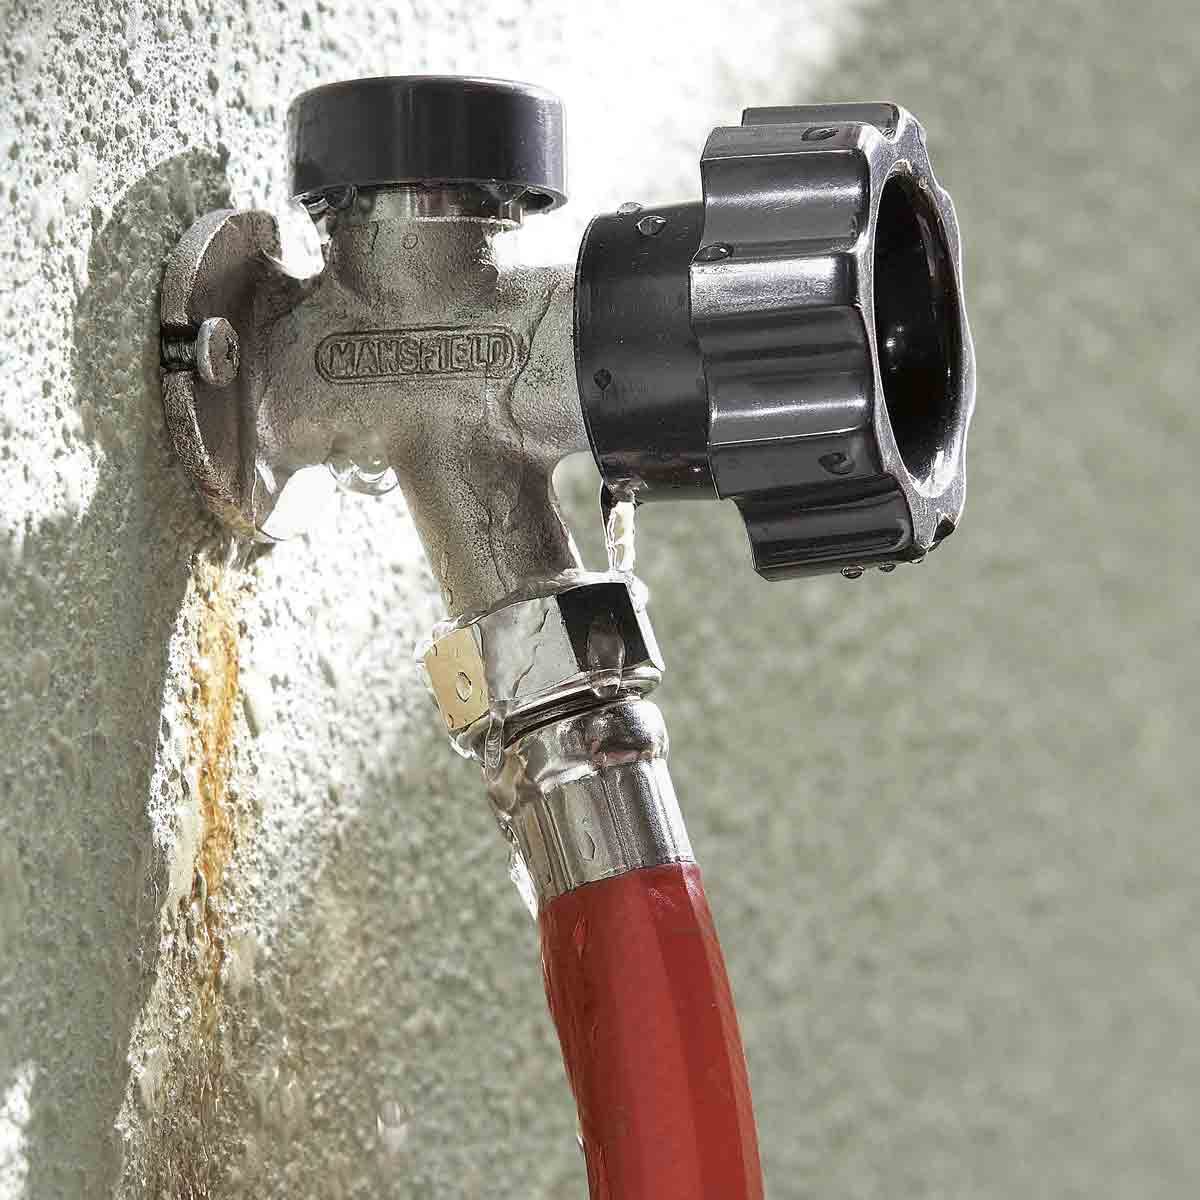
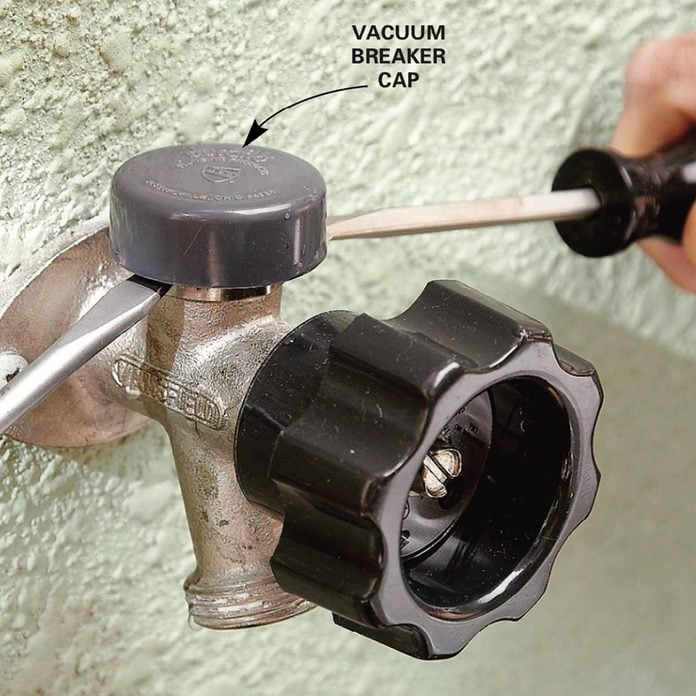
Using a screwdriver, carefully remove the screw that holds the handle in place. In some cases, you might need to use pliers to gently pry off a decorative cap to access the screw. Once the handle is off, set it aside in a safe place.
Step 3: Inspect and Replace the Washer
Take a close look at the washer inside the faucet. If it’s worn out or damaged, it’s probably the culprit behind the leak. Replace it with a new washer of the same size and material. Make sure it’s seated properly before moving on to the next step.
Step 4: Check the O-Ring
While you’re at it, inspect the O-ring as well. This small rubber ring helps create a watertight seal, and if it’s cracked or dried out, it can cause leaks. Replace it if necessary, making sure to apply a little plumber’s grease for smooth operation.
Step 5: Clean the Valve Seat
Over time, mineral deposits can build up on the valve seat, causing leaks. Use a small brush or toothbrush to gently clean the area. If the valve seat is cracked or damaged, you may need to replace it. This is a bit more advanced, so consider calling a plumber if you’re not comfortable doing it yourself.
Tips for Preventing Future Leaks
Fixing a leaky faucet is one thing, but preventing future leaks is another. Here are a few tips to keep your outdoor faucet in top shape:
- Regularly inspect the faucet for signs of wear and tear
- Drain the pipes before winter to prevent freezing
- Use plumber’s tape on all threaded connections
- Avoid over-tightening the handle, as this can damage the internal components
By following these simple tips, you’ll minimize the risk of future leaks and save yourself a lot of hassle.
How Often Should You Inspect Your Faucet?
Experts recommend inspecting your outdoor faucet at least once a year, especially if you live in an area with harsh weather conditions. This will help you catch potential problems early and prevent costly repairs down the line.
Common Mistakes to Avoid
Even the most experienced DIYers make mistakes from time to time. Here are a few common pitfalls to watch out for when repairing a leaky outdoor faucet:
- Forgetting to turn off the water supply
- Using the wrong size replacement parts
- Over-tightening screws or connections
- Not cleaning the valve seat thoroughly
Remember, patience is key. Take your time and double-check your work at each step to avoid these common mistakes.
When to Call a Professional
Let’s face it, sometimes DIY projects don’t go as planned. If you’ve tried everything and the leak persists, it might be time to call in a professional plumber. They have the expertise and tools to diagnose and fix even the most stubborn leaks.
Conclusion: You’ve Got This!
Repairing a leaky outdoor faucet might sound intimidating at first, but with the right tools and guidance, it’s a task that almost anyone can tackle. By following the steps outlined in this article, you’ll not only save money on plumbing bills but also gain a sense of accomplishment.
So go ahead, roll up your sleeves, and give it a shot. And when you’re done, don’t forget to share your success story in the comments below. Who knows, you might inspire someone else to take on their own DIY project!
Table of Contents
- Why Do Outdoor Faucets Leak?
- Common Signs Your Outdoor Faucet Needs Repair
- What You’ll Need to Fix a Leaky Outdoor Faucet
- Where to Buy Replacement Parts
- Step-by-Step Guide: How to Repair a Leaky Outdoor Faucet
- Tips for Preventing Future Leaks
- How Often Should You Inspect Your Faucet?
- Common Mistakes to Avoid
- When to Call a Professional
- Conclusion
Fix a Leaking FrostProof Faucet Family Handyman

Binge Thinking DIYTROS Fixing a Leaky Outdoor Faucet
Breathtaking Tips About How To Repair Outdoor Faucet Pricelunch34
